At one point, your new home was just a dream. Many hours were spent on research and planning. Even more time was devoted to the construction and building process. During the process an exterior finish for the logs or siding was chosen. It was one of the most important decisions to make because of the long-lasting effects it would create.
Selecting an Exterior Finish
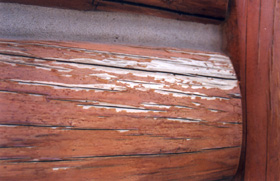
The exterior finish is the most visible feature of a log or wood sided home. Choosing a finish is not an easy decision to make. Finishing a log home or exterior wood home can be a complex process. Choosing a durable finish with realistic expectations is difficult because vast amounts of conflicting information are available.
Please refer to our guide “What to look for in an Exterior Finish” as it will provide you with good information for selecting a wood finish for your log home, or any of your exterior wood projects.
Remember to choose an exterior finish that:
- Does not cover up the wood
- Weathers in a way that is easy to maintain
- Lasts three to five years between recoats
Follow those guidelines and you will have chosen a good exterior wood finish.
Setting Up To Apply The Finish
After the exterior wood is properly cleaned, brightened, rinsed and has been allowed to dry, the surface is ready for finishing. Even new wood should be cleaned before coating. Remember, this is the first coat of finish the wood will receive. If you are doing it yourself, be sure to follow directions on the product label. If a contractor is hired to complete the job, it is important to verify that the contractor follows the directions as stated on the product label.
“Do Not Apply In Direct Sunlight.” Many contractors will argue with this statement. Generally, contractors do not like being told how to do their job. It will be like talking to a brick wall most of the time. (Note: I have been a painting and wood-finishing contractor since 1983. I know how they can be.)
Applying a finish to a surface that is not in direct sunlight gives the finish a chance to “bite” into the wood. If the surface is hot and dry, the solvents in the finish will quickly evaporate. The solvents help the finish “grip” the surface. There will be many problems ahead if the finish is not able to grip or bond. To avoid potential problems, do not work in direct sunlight. It is easier on both the finish and the finisher. It is necessary to plan the day accordingly. It is best to start on the south side early and be done on that side by 10:30 a.m. Proceed to the west side then move to the north and finish on the east side. As a suggestion, have the south side masked the night before to be ready for an early morning start.
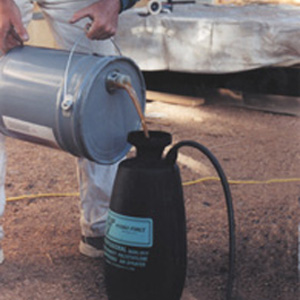
Many finishes can be sprayed, but spraying is not enough. Even though it is more time efficient to spray, it is essential to back brush the product into the wood. The finish can be sprayed onto the wood surface with a pump up sprayer or, an airless sprayer. Finish the job by back brushing the finish into the wood.
Penetrating oil finishes are the easiest to work with when it comes to brushing. Some of the emulsified oils and water-borne finishes are more complicated to work with. These products tend to dry more quickly and are difficult to back brush. Brush these finishes a lot to prevent lap marks and inconsistencies in the over-all appearance.
When hiring a contractor, it is always a good idea for you and them to be familiar with the procedures and directions stated on the product label. Never assume that a painting or general contractor will know the proper procedures and will follow them according to the directions. Trust and verify. It is the best assurance that your dream home will come out like a dream and not a nightmare.
Typically, one wet-on-wet application is sufficient for the first coat. The wood will “season” and change dramatically over the course of the first 12-18 months. Do not build up a triple coat of finish on the first application to any new wood. Building multiple coats of finish on new wood may result in peeling and a difficult and expensive restoration may be required.

Let’s Do It – The Process
The first step is to mask windows, move cars, protect landscaping, stone, rock, plants and hide the cat and dog. Overspray goes everywhere especially where you don’t want it to, so be prepared for it.
Set the airless sprayer at the lowest pressure possible to generate a steady, controllable spray pattern. If using a pump jug, move a bit slower and you will not have as much overspray. Be sure to wear a respirator, a long sleeve shirt and other protective clothing when spraying. Lungs and skin will absorb the finish just like the wood. You are not wood and don’t need to be preserved, so protect yourself.
Wet-on-wet is a method that has been used to finish hundreds of log and wood sided homes with penetrating oil finishes. It is best to work a section at a time. Wet the wood by spraying a liberal amount of finish onto a section. Spray from the bottom up. Get the wood wet but don’t brush yet. Depending on the product you are using, apply the second wetting application within 30 minutes. Now brush the finish into the wood.
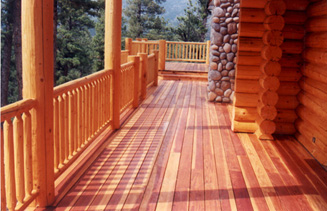
Repeat the process on each section. Typically, vertical surfaces are done before horizontal surfaces. For example, if you were doing a deck, start with the rail first. Spray a section then go back and do the same section again. After brushing the finish into the wood of the rails, go on and do the deck floor using the same process.
If working with an emulsified oil or acrylic-based product there is not as much time for back brushing as with a penetrating oil finish. Until you become familiar with the process and the way a particular finish works, work in small sections to get used to it. Then do the larger walls.
Once the house is done stand back and look at the job. There should not be any lap marks, drips, runs or blotches.

TOOLS : Use an airless sprayer or pump jug to spray the Wood Iron Exterior Wood Finish.
Recap
Remember, when finishing a new log or wood sided home:
- Make sure the wood is properly clean, dry, and ready for a finish.
- Plan the work for finishing to be done out of direct sunlight.
- Spray, if possible, to increase efficiency.
- Use a wet-on-wet application method.
- Always back brush the finish into the wood.
When the house looks good, you will be a satisfied and proud homeowner.

No Solid Body Opaque Stains here!!!