When you are facing a difficult job it is always better to get some advice before proceeding. Exterior wood restoration is difficult when you don’t have the help of some one that has done it before. All Wood Iron representatives have done exterior wood restoration. They are your best source of information specific to your needs. Look through this section, first, and then call your Wood Iron representative. It will help you to understand the process.
As a general guide download “Methods of Refinishing”. This guide will be helpful. The methods and product recommendations will work in 90% of the jobs you may encounter. We can send you samples of the Stain Remover we recommend in Methods of Refinishing. It might be best to see if that will work first. Then move up from there.
Removing The Failed Exterior Finish
This section deals with the most difficult restoration job there is. Removal of multiple coats of finish that have built up on the surface and are now peeling and cracking is the toughest job there is.
You have either inherited this situation by purchasing a home with this problem or you have created it yourself by not following the guidelines of “How To Select An Exterior Finish” found in this web site.
No matter how you got to this point we can get you back on track.
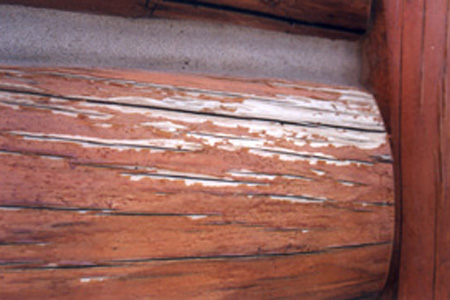
A peeling finish that looks like this must be completely removed.
After the wood is completely cleaned, sanded, and rinsed it is ready for the finish.
Finishing Restored Exterior Wood
Our goal is to create a finish that:
- Enhances the beauty and character of the wood rather than covering it up.
- Is easy to re-coat with minimal problems and expense.
- Is durable enough to last a realistic yet reasonable length of time.
In addition to other anti-weathering ingredients Wood Iron can be tinted in the field to any depth of color you need. The trans-oxide tints used in Wood Iron are the best UV protection there is.When it comes to creating the color you want for your wood start with the standard color by adding one can of tint per 5 gallons of clear base. If you want additional color and UV protection add up to 5 cans of tint per 5 gallons of clear base.
These trans-oxide tints combine with two other UV inhibitors found in the clear base to give your wood the best protection available in any finish today.
The ability to tint in the field is important when it comes to finishing restored wood. Why? Because the soffits and other non-weathered areas of the home are probably okay. You really don’t have to remove the finish in areas that are not peeling unless you want to.
The areas that aren’t peeling and don’t require removal can be matched in color and appearance with the use of Wood Iron. This is important because you must match the color and appearance of those non-peeling areas with the finish in order to create the over-all professional and polished look that you want. You can do that in the field using the Wood Iron tint-in-a-can tinting method.
If you are unsure about matching start with one gallon of clear base and add tint. Brush on two coats on a test section. If you need more color add more tint. Two coats is what is recommended on all restored wood.
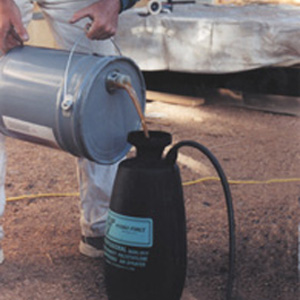
TOOLS : Use an airless sprayer or pump jug to spray the Wood Iron Exterior Wood Finish.
More Info
Please see the Finishing New Exterior Wood page for more information on the finishing process, or the Wood Iron Videos page for helpful videos.
THE FINISHING PROCESS
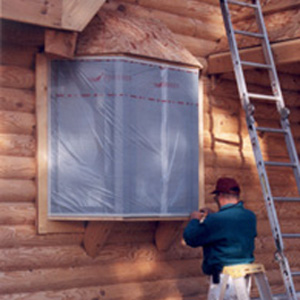
STEP 1 : MASKING
Re-mask the exterior windows if the masking has not held up during the pressure washing.
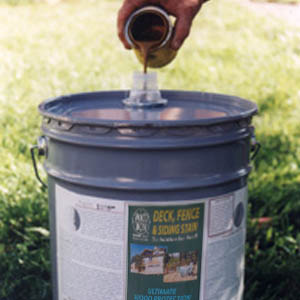
STEP 2 : MIXING
Mix the trans-oxide tints you need into the Wood Iron clear base, and then pour it into your airless sprayer or pump jug.

STEP 3 : APPLICATION
Spray a wet-on-wet coat of Wood Iron onto the wood. Make sure you apply the finish out of direct sunlight.
STEP 4 : BACK-BRUSHING
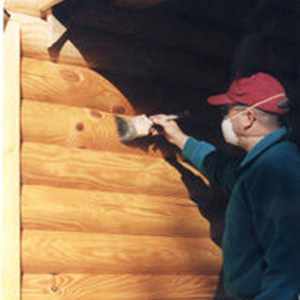
Back brush the material into the wood after the second “wet” application. Brush out any puddles. Brush with the grain of the wood.
What you get is the finished look that you wanted without all of the restoration problems you had before.
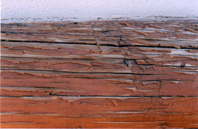
THE PROBLEM BEFORE.
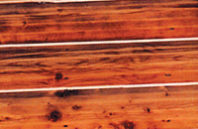
THE RESULTS AFTER.